
The X3 chip is one of the latest 4. generation chip for the hi-end user. It fights directly with Xentium and SmartXX, both very popular. But the X3 is long over due, they first announced it would be available in January 2004, but after delay after delay it was finally released in the end of September 2004.
The X3 is developed by the same team that previously released general BIOS updates for the simpler and broader spectrum of basic modchips, the Xecuter2 BIOS, and high quality modchips, the Xecuter 1 and Xecuter 2 series. Both Xentium and SmartXX is powered by it's own OS, and that's something X3 had to include to be able to battle in the harsh modchip environment created by its predecessors.
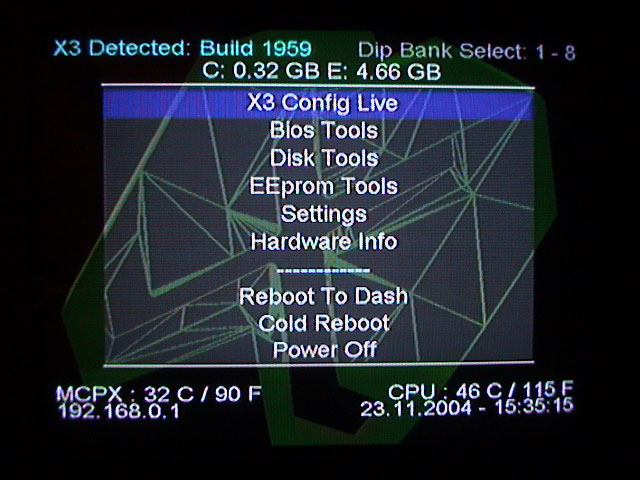
Combining the fact that Team Xecuter previously built bios' and released quality modchips, releasing a very good 4. generation modchip shouldn't be impossible for them. And it weren't, it just took a bit of time to bugfix and ratify the chip and the software. The OS is now known as X3 Config Live.
The cool thing Team Xecuter could do was, besides creating a dedicated X3 OS, to include a BIOS inside the OS. This opens a lot more possibilities since you know have directly control over the bios within the OS and special features could easily be emblemed. Xentium and SmartXX both require the user to supply the bios to be flashed in the chip (since they don't develop any bios them self).
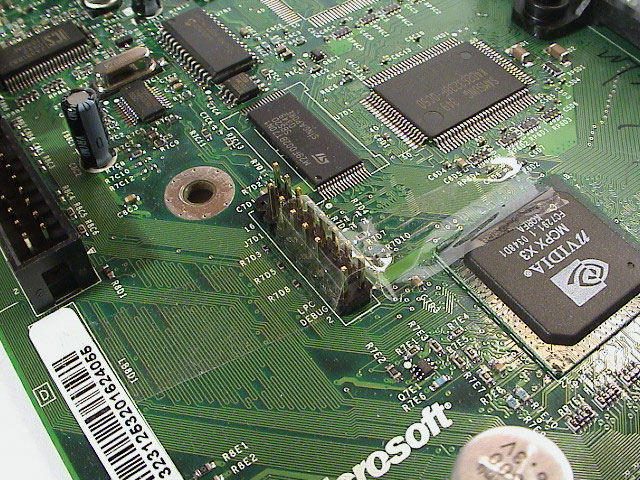
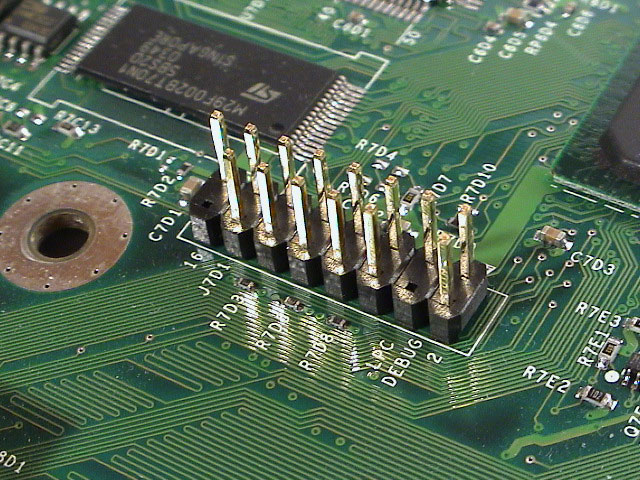
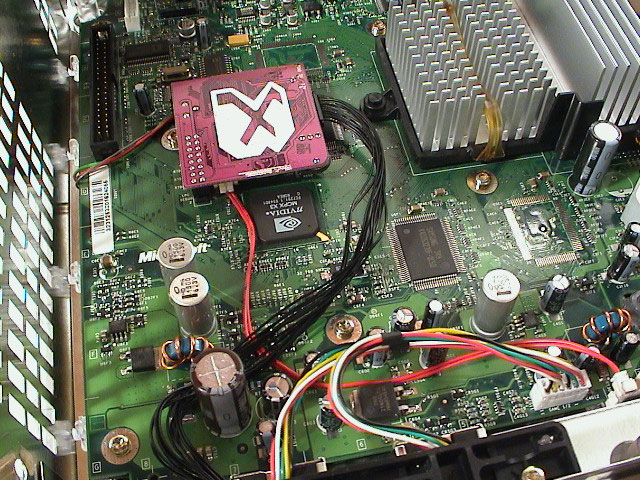
I selected the pin-head installation just because it looks the best and the chip is much easier to handle than in a wire installation. The official Xecuter 3 installation is 'the best' so I'll just show how I did the installation and what quirks I stumbled upon.
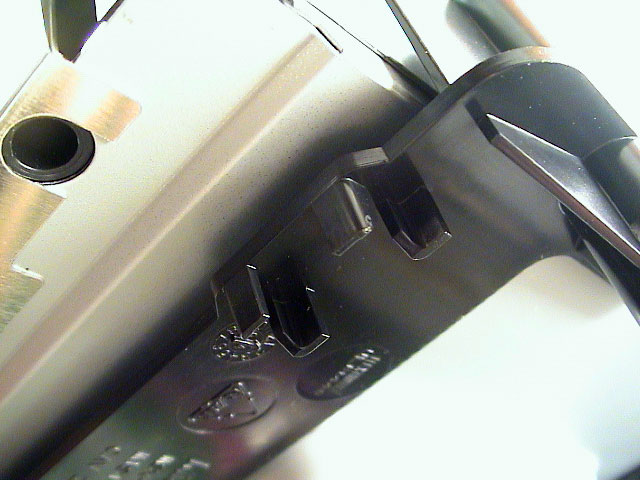
If you have a v1.0-1.5 Xbox, position the pin-head is a no-brainer. Use some tape to hold it in position while soldering it to the motherboard from the bottom.
|
|
|
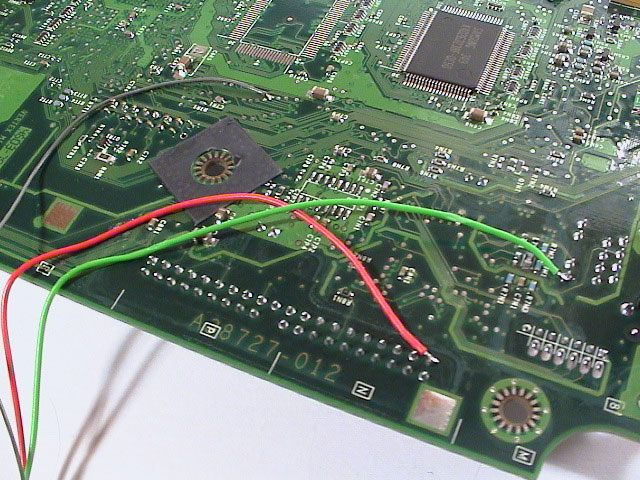
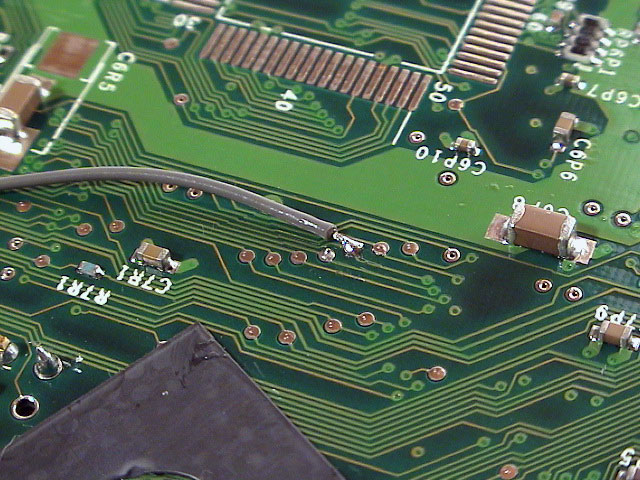
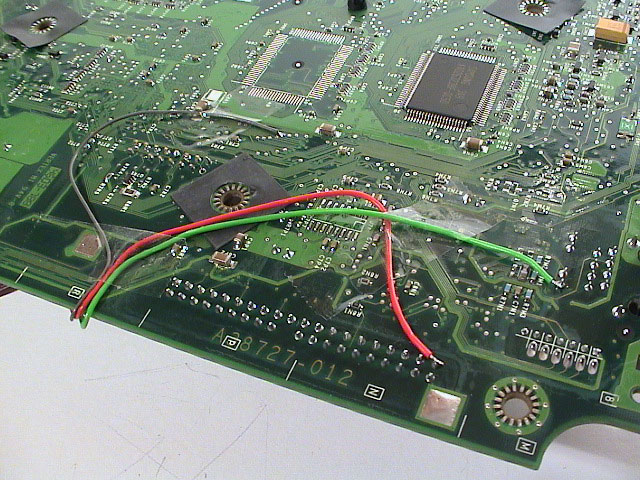
Select the red, green and grey wire harness and solder the green wire to the LAN connector, the red to the HDD connector and the grey to the D0 point. All of them at the bottom of the motherboard. Check the pictures for the exact location.
 |
 |
 |
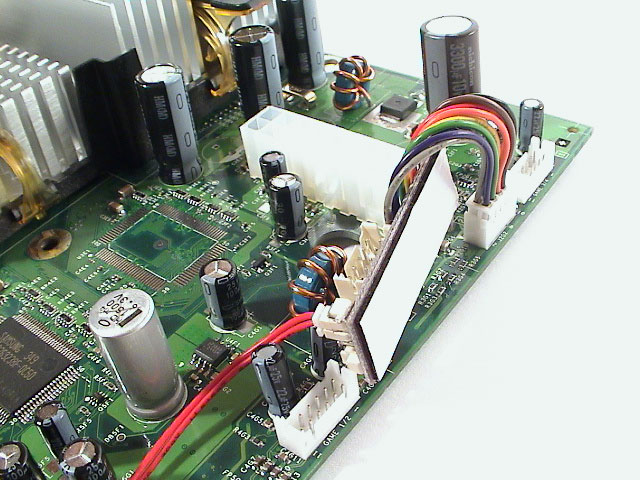
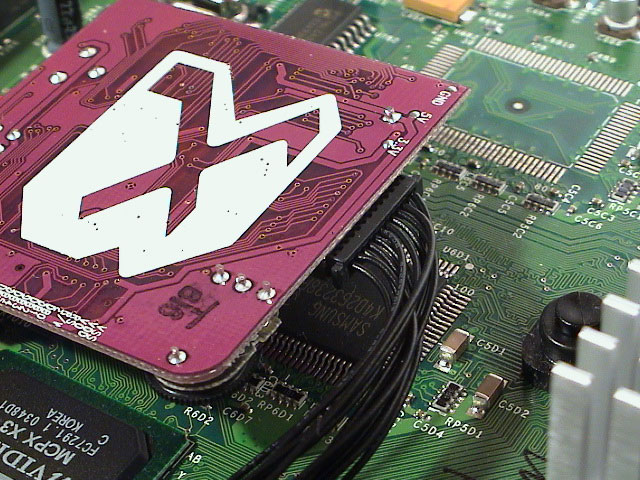
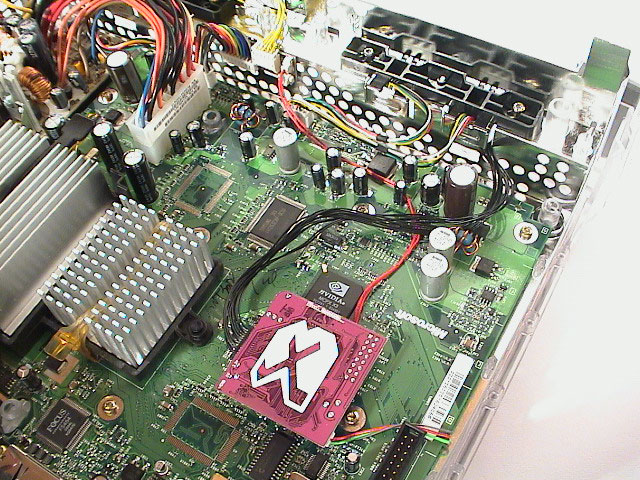
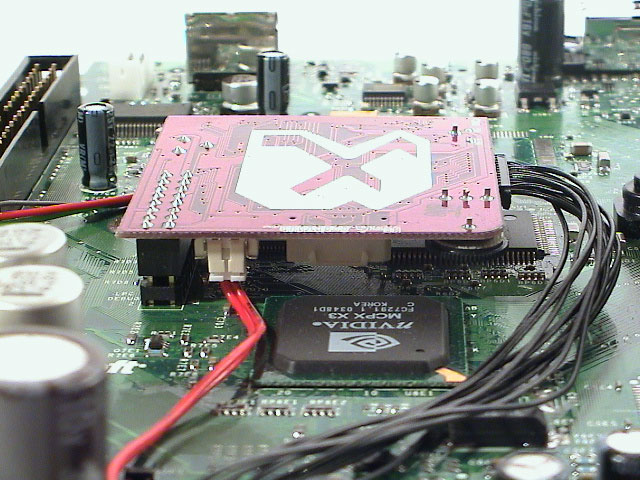
Now, connect the double-red frontpanel wire and the one you just soldered to the X3 chip. Position the chip on top of the pin-head, this makes it easier to handle wires later on.
 |
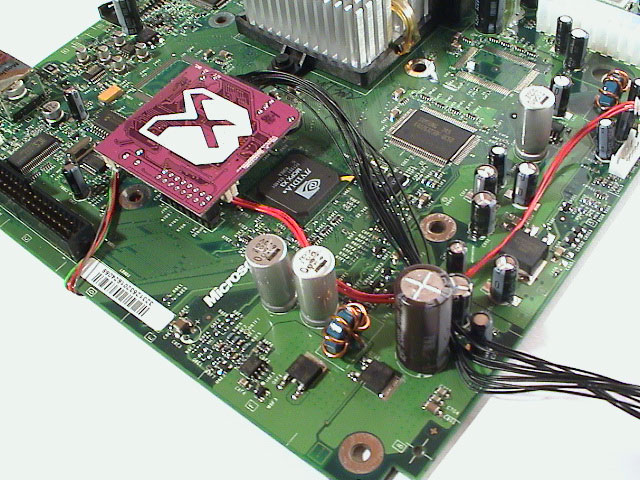
When the wires are connected to the X3 you get an idea where to bend the wire (D0/LAN/HDD) around he edge of the motherboard. Some slack is still necessary to avoid stress on the connectors. Tape down the wires so that they don't move, touch or cover anything, like the screw hole.
 |
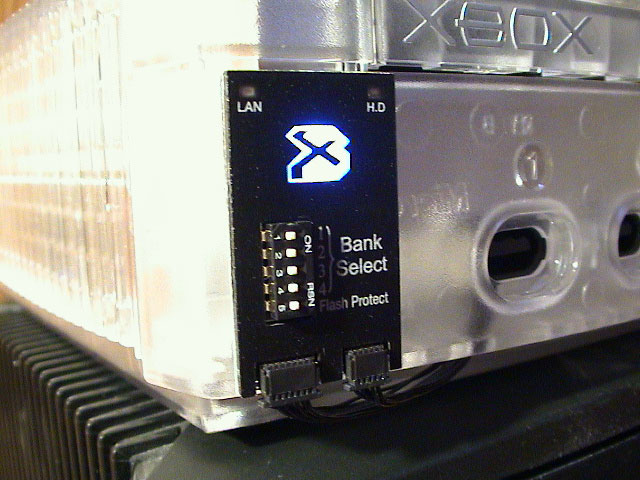
This board is really just a simple board to tap into the eject and power button (possible LED control) signals. You can either connect it before you insert the motherboard into the case or after, doesn't really matter. I connected it before.
 |
 |
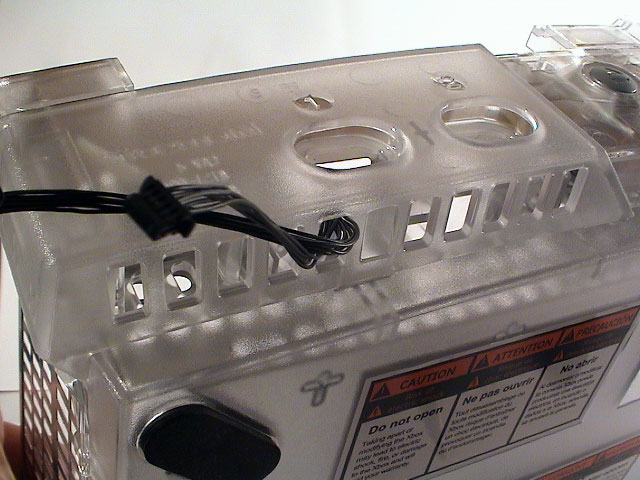
But when you stick the board to the case you need to be more cautiousness. The DVD drive, at least the Philips drive, has a plastic tap that could be problematic if the board is positioned wrong. Make sure you position it to the right of the tab holding the frontpanel in place. The tab can be seen just under the insertion board, down-right.
 |
 |
 |
| Wrong! | Correct. | The problematic plastic tap. |
You don't really need to install the external board if it you think it ruins the esthetically frontpanel design (for me it does). Anyway, this customer wanted it.
The same applies here as above for the black wire harness, connect it whenever you want.
 |
 |
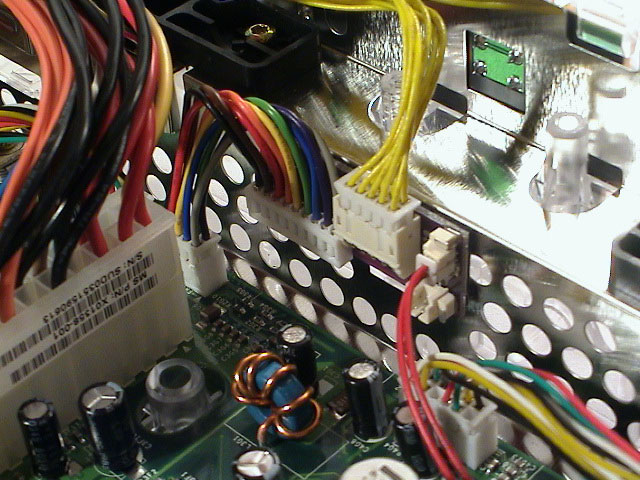
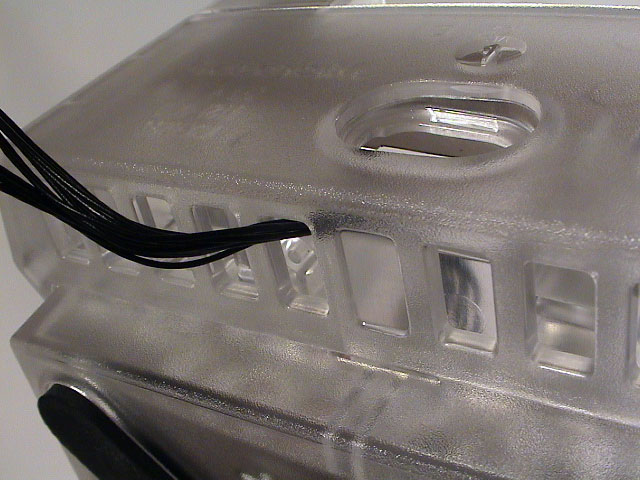
When the motherboard is back into the case you will need to remove the controller bar for port 1 and port 2 so that the wires can be routed to the outside the case. Put the two wire connectors through the leftmost hole in port 1 seen from the front.
 |
 |
 |
 |
 |
 |
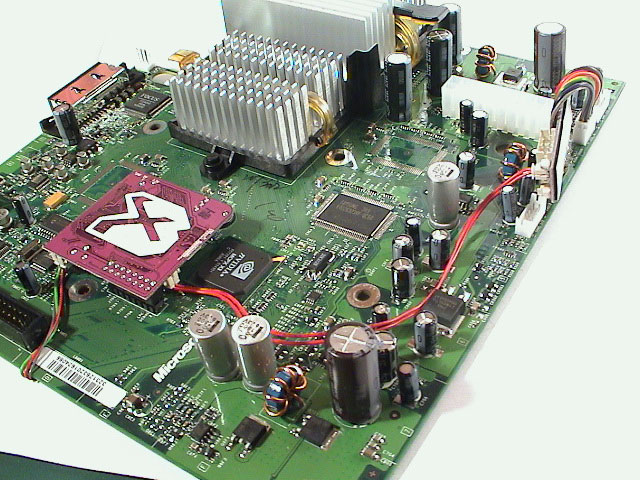
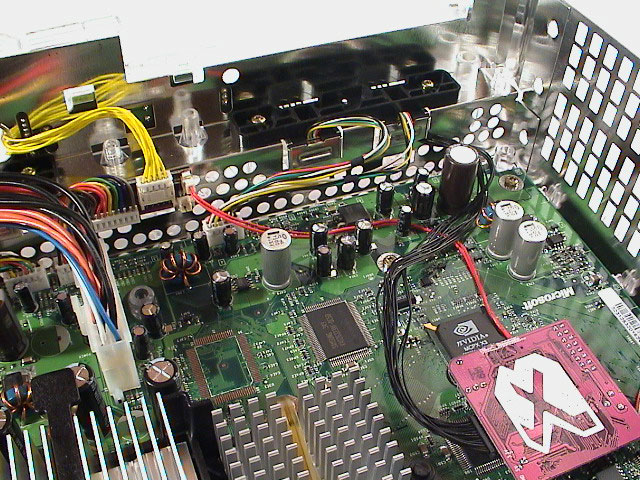
When the pin-head installation is finished it should look something like in the pictures below.
 |
 |
 |
 |
For such an advanced chip, this installation is one of the easier I've done.
There are three different modes to power up the Xbox now; Xecuter 3 modchip, retail Xbox BIOS (Xbox Live) and X3 recovery mode.
 |
 |
 |
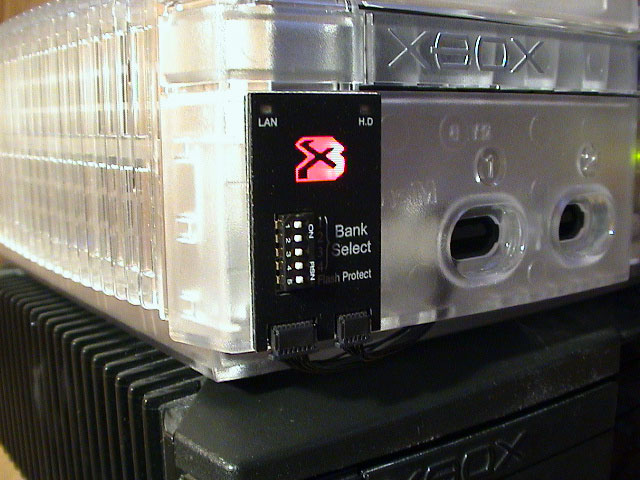
| Xecuter 3 modchip: Quick press on either button powers up the X3 chip. Indicated by blue light on the external board. | Retail Xbox BIOS: Long press, 1 second, on the power button disables the chip. Indicated by red light on the external board. | Recovery mode: Pressing both eject an power together toggles the recovery mode. Indicated by bright purple light on the external board. |
There's a more detailed picture at the bottom of the official installation guide.
All the different modes works even if the external board isn't connected, you just have to get a feeling how long you need press the buttons and watch the BIOS start up to determine whether the chip is disable or not.
Since the X3 Config Live OS emblems a BIOS, the software cannot be legally distributed. Instead Team Xecuter built a flashing facility to put the X3 OS, or another BIOS for that matter, on to the 2 MB flash memory.
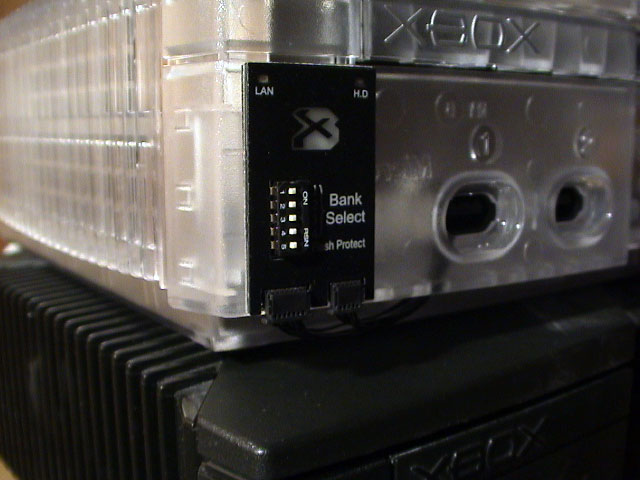
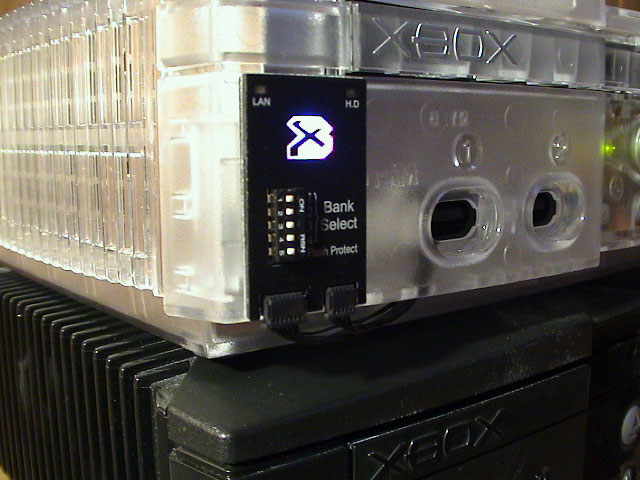
When flashing the X3 Config Live OS the dip switches needs to be set for 1 MB flash (look below). If the external board isn't connected, it automatically defaults to 1 MB (actually I think it's the first 1 MB portion of the flash memory and without any forced restrictions for the last portion since it can be software controlled).
Setting up the dip switches can be a hurdle at first, but once you get to know the system it's pretty easy. The first thing to know is that each 'bank' is 256KB, all other sizes are created by combining two or more banks. There's a more detailed description at the Unofficial X3 Guide & FAQ, under "X3 External Switch".
The 15 different bank sizes available can be configured as follows:
|
|
|
|
||||||||||||||||||||||||||||||||||||||||||||||||||||||||||||||||||||||||||||||||||||||||||||||||||||||||||||||||||||||
Note: Dip switch 5 is used for write protection and should be set to 'Off' when you want to flash. The switch on the X3 chip should also be set to 'Off', or pointing towards the pin-head connector.
You can at any time mix the bank sizes listed above, i.e. you can have the 1 MB X3 Config Live bios in bank 1 to 4 and regular smaller bios' (256KB, 512KB or 1024KB) in separate banks from bank 5 to 8. Also, instead of having to switch the dips all the time you can software boot/control them in the X3 Config Live OS.
If you want to flash a large BIOS (over FlashBIOS) and forget to set the correct dip switches, it will either flash the first portion of the bios file that fits into the selected bank if it's too small (incomplete) or if the bank is too large the bios will fill the first portion of the bank (complete).
I.e. flashing a 512KB bios to a 256KB bank will only flash the first half of the bios, 256KB. Or flashing a 1024KB bios to a 2048KB bank will only fill the first 1024KB of the bank. Only difference is that the first won't work and the latter would.
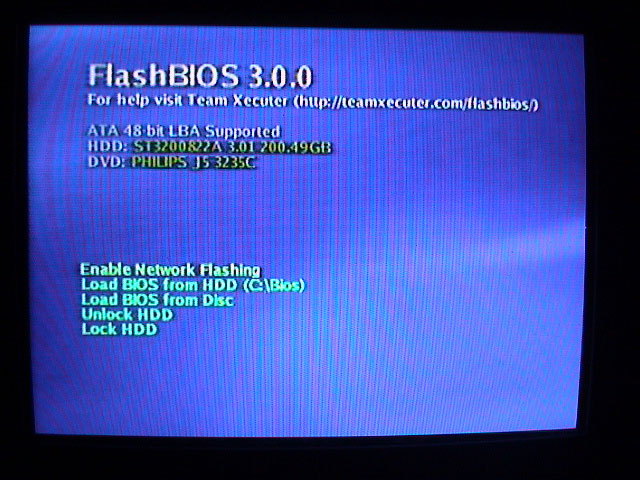
Get the latest X3 Config Live from Xbins, as of writing its X3 1959. If you know your networking, I recommend the HTTP flash method. It's easy, no need for CD-RW discs, no akward ftp logins and it's one of the fastest methods if you start from scratch and have your network already going.
In FlashBIOS 3.0.0, or higher, select "Enable Network Flashing" and after a few seconds, when network module has initialized, it will spit out an IP address. If no DHCP server is detected it will automatically fall back to a static IP address, 192.168.0.99.
 |
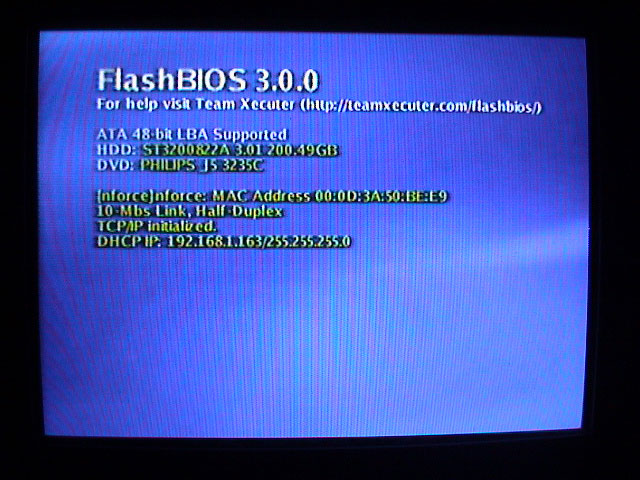 |
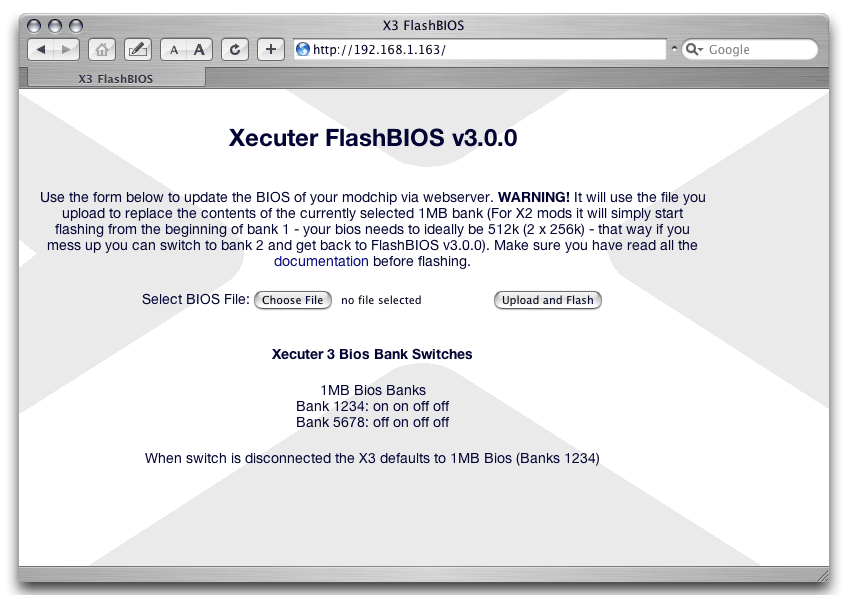
Open your favorite web browser (Firefox, Opera or Safari) and enter the IP address FlashBIOS spit out, i.e. http://192.168.1.168/. The webfront end should load and you can select the BIOS you want to flash to the X3 chip.
 |
 |
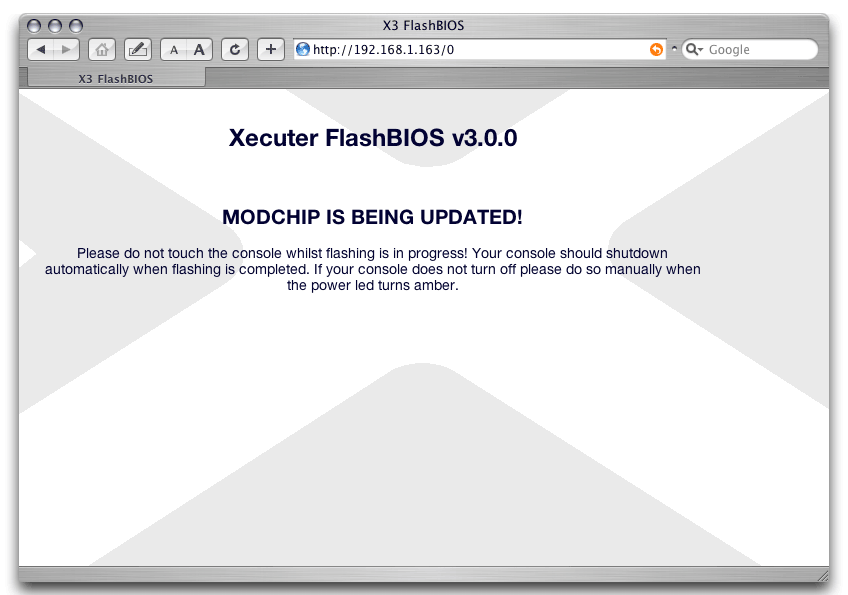 |
| This is the frontpage of the HTTP flash method. | Select the correct BIOS for your Xbox. | It takes about 7 seconds to upload the flash. The Xbox will turn off when finished and this page will only load infinitely. |
 |
 |
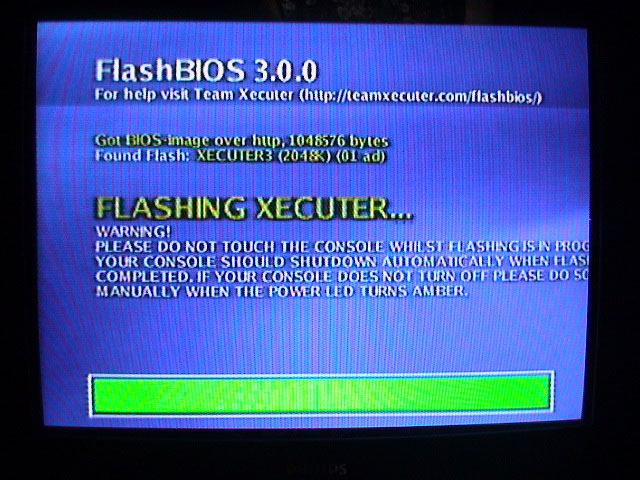 |
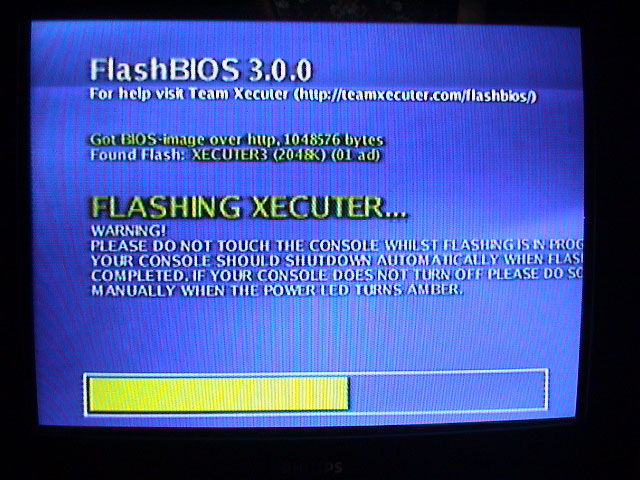
| Erasing... Takes about 10 seconds. | Programming... Takes about 12 seconds. | Successful. Shuts down after about 2 seconds. |
Total upload and flashing time is around 31 seconds.
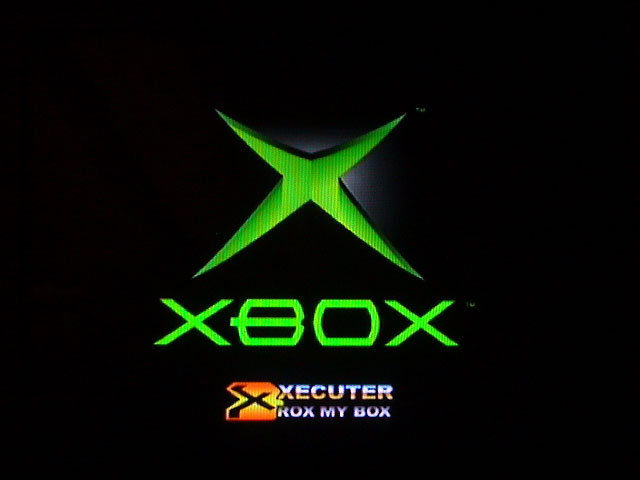
When you now turn on the Xbox the text below the X should read 'Xecuter 3 Rox My Box' and it confirms that you successfully flashed the X3 Config Live OS to the chip. If the Xbox frags, check the dip switches and enter recovery mode to try again.
 |
 |
X3 Config Live Tips and Tricks:
Official Xecuter 3 pin-head installation [teamxecuter.com]
Official FlashBIOS tutorial [teamxecuter.com]
Unofficial X3 Guide & FAQ [castcom.net]
Xecuter 3 hardware revisions [x-pec.com]